FEATURED AT FABTECH 2023
FEATURED AT FABTECH 2023
One System
FoR ALL YOUR MEASURING REQUIREMENTS
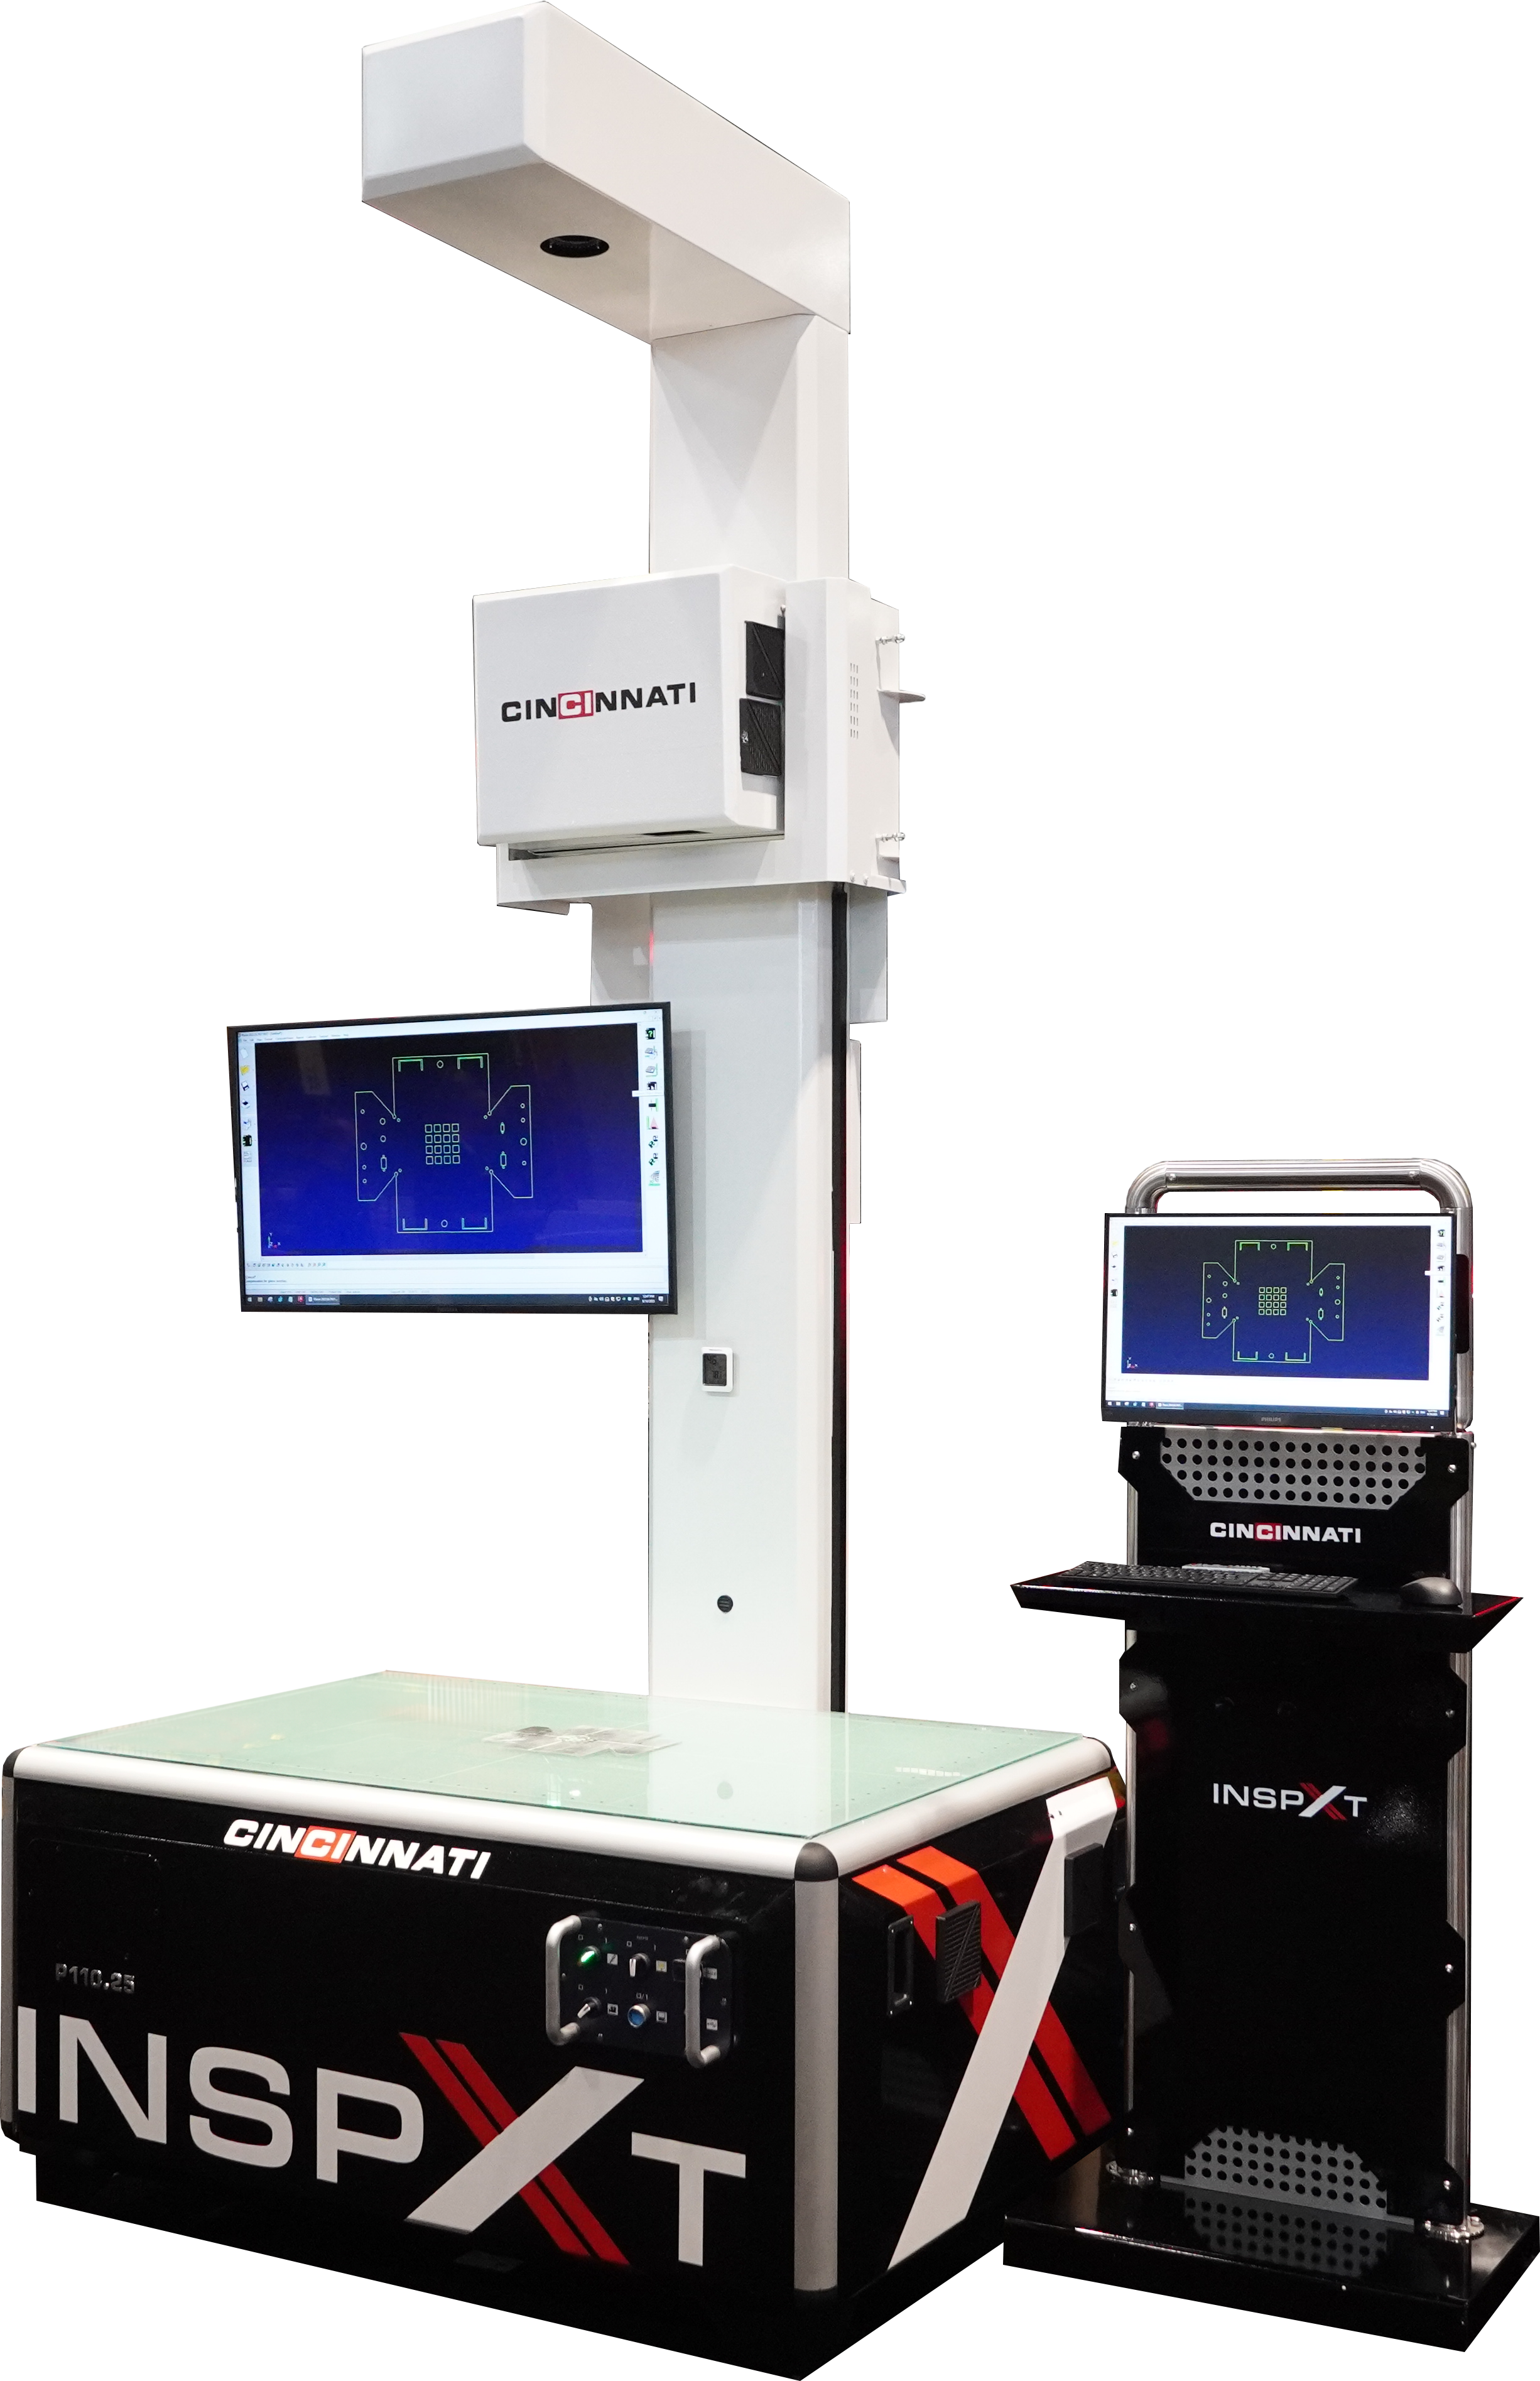
Designed to facilitate rapid and precise first article inspection, quality reporting, and reverse engineering. INSPXT is an excellent tool for shop floor usage, as it demands minimal operator involvement and has a proven track record of enhancing production efficiency across various applications.
THE TECHNOLOGY 2-D INSPECTION
No comparable system on the market today offers this kind of capability with such ease of use and speed. For those who require 3D reverse engineering, optional 3D modules can be utilized to achieve this.
Every INSPXT system comes with a standard feature for 2D reverse engineering. This feature allows for the quick creation of dxf or dwg CAD files from existing parts within seconds. Additionally, this software provides functionalities for data editing and cleaning, such as standardizing hole sizes and cleaning edges. Not only does this eliminate the need for hand measurements and CAD programming, but it also allows for the reverse engineering of physical parts, paper, acetate, or electronic image files to create CAD files.
WHY CHOOSE INSPXT?
World’s fastest 2D inspection and reverse engineering system
Fully automated one click inspection
Machine sizes range from 500mm to 3000mm
Accuracy from 12 microns
No moving parts
Scratch resistant
Designed for shop floor use
Simple calibration and minimal maintenance
Minimal training required
Easily retrofitted with full 3D scanning
Rapid return on investment


Specifications
Due to a continuous product development program, engineering data and dimensions are subject to change without notice. Certified foundation plans will be furnished for each installation.
| Description | Specification/Scope of Supply |
|---|---|
| Max component length | 59 in |
| Max component width | 39 in |
| Max component thickness | 14 in |
| Max component weight | 551lbs – UDL (Uniformly Distributed Load) |
| Measuring accuracy, length & width** | +/- 35/70 μm* |
| Measuring accuracy, height** (optional) | +/- 200 μm* |
| Measuring speed** | <0.25sec |
| Camera | Industrialised ultra high resolution professionally mounted in sealed enclosure |
| Computer processor | Intel Quad or Dual Core |
| Processor speed | >3GHz |
| Hard disk | <125Gb |
| Screen | 20 inch flat screen or better |
| Peripheral equipment | Keyboard and optical mouse |
| Operating software | Windows 10 - 64 Bit |
| Proprietary InspecVision software | Inspection, SPC, Reporting, Reverse engineering |
| Data cable | USB 2 or USB3 |
| KVM | Keyboard, Video Display & Mouse stand (PC integrated into light table assembly) |
| Light table construction | Frame with removable sheet metal cladding |
| Light table measuring surface | Laminate glass, toughened with integral diffusion layer |
| Light source | High efficiency LEDs |
| Mast construction | Heavy folded sheet metal construction |
| Power supply | 230 Volt, single phase, 50Hz or 110 Volt, single phase, 60Hz on request |
| Power consumption | 10 Amp maximum at 230 Volt, 15 Amp max at 110 Volt |
| Protective devices | Circuit breakers, mounted at rear of light table |
| Control panel | Control switches for power, camera and lights. Main power indicator |
| EC directives | Compliant with Machinery, Low voltage and EMC Directives |
| Ambient operating conditions | 10-30 degree C |
| Approx Installed Footprint of Light table and Mast | 74in (W) x 58in (D) x 157in (H) <1819lbs |
| Approx Installed Footprint of Computer Cabinet (inc keyboard tray) Optional | 28in (W) x 19in (D) x 68in (H) <99lbs |
| Standard packing | Export crates suitable for sea shipping (2 nos) |
| Warranty | One year limited warranty on hardware and software |
| Optional extended warranty | Two or three year extended warranty (requires software upgrade option) |
| Software support option | Annual support contract provides free software upgrades |


